Mops vs. Markers
Mops vs. Markers Introduction & Early Days: The Evolution of Graffiti Tools
Graffiti didn’t start with high‑pressure ultrawide cans or premium refillable valve markers & squeeze mops. It began as raw expression — names, tags, and messages scrawled wherever writers could reach and on any surface their or paint ink would stick to.
Over time, the tools evolved. What began as simple markers and pens transformed into specialized capillary markers, valve action markers, and eventually squeezers, which came from bingo daubers & home-made “mops” — giving writers more control, coverage, durability, and most importantly- STYLE.
I. Graffiti’s Early Days
Many trace the modern graffiti movement back to the 1960s, with early writers like Cornbread and Cool Earl — early Philadelphia taggers — using black markers to sign their names on all kinds of public surfaces. This specific topic on who actually “started graffiti” is heavily debated by OG’s from Philly & New York. Names & dates are used for reference only.
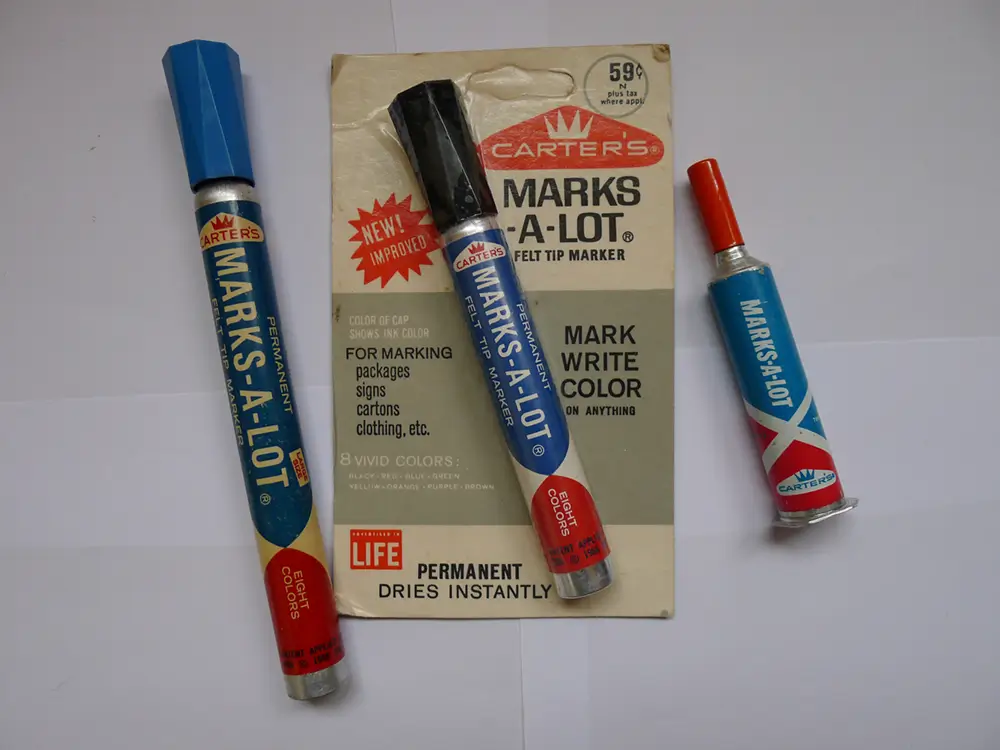
In the early 1970s, surface‑appropriate markers bought or stolen from offices or supply stores — simple felt tips like the Cado Flo-Master or Carter’s Marks-A-Lot, were often the go-to tools.
The Role of Flo‑Master (Cushman & Denison / Esterbrook) in Early Graffiti
What was Flo‑Master?
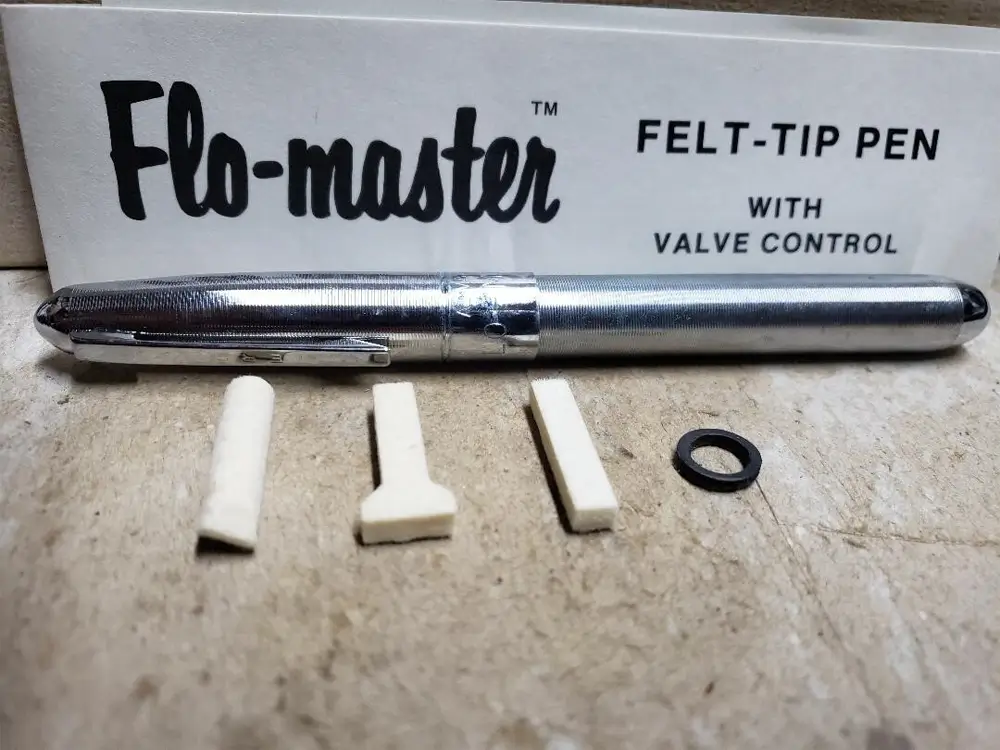
Flo‑Master began as a line of refillable markers — launched by Cushman & Denison in the early 1950s.
In 1953 the American branch was acquired by Esterbrook, and by the 1960s‑67 the company had merged more fully, with Flo‑Master inks becoming a core product under Esterbrook and the “Gem” brand line.
These weren’t your typical pens — they came with felt or fiber‑tips (or other nib options such as the chisel tip, the T-nib, and even a square-shaped nib), and were refillable. The 1oz. and 2oz. tins, resembling small oil cans, were available from Flo-Master Ink and was used to refill the marker pen when empty.
II. From Felt‑Tip (Capillary style) to Valve Action / Refillable Valve Markers
Early Flo‑Master pens were felt‑tip style — meaning they used a porous tip to deliver ink (somewhat similar to what later became “capillary markers”) like today’s Pilot SuperColor or Molotow Tagger markers.
As the technology advanced (under Esterbrook’s oversight), Flo‑Master evolved: the company released new & improved “Valve Action Markers” as part of their “Mark I / Gem” line, using needle‑nose refill cans and valve technology to deliver ink more effectively — expanding what marker pens could do.
These valve markers could deliver permanent, durable ink — including “opaque ink” designed to stick to non‑porous surfaces like glass or metal. That made them ideal for graffiti writer’s favorite surfaces (subway car insides, phone booths, windows, stop signs etc.) where regular pen ink or brush‑type markers wouldn’t cut it.
Flo‑Master’s Rise with Early Graffiti Writers (’70s–80s)
According to historical graffiti‑tool records, when street‑writing started to take hold in New York subways in the early 1970s, Flo‑Master’s opaque inks became one of the go‑to mediums. They adhered to many surfaces and could cover older tags — a big advantage for writers looking to “toy out” or overwrite.
The versatility of refillable ink, portability, and the variety of tip‑widths (from narrow to wide — “Wescosa Mini‑Wide”, “Wescosa Ultra‑Wide”, etc.) made Flo‑Master markers popular among the taggers and writers.
Because the inks were so durable and opaque, the Flo‑Master marker allowed graffiti writers to move beyond simple pen tags and start doing bolder, more visible tags and pieces, even on hostile surfaces like weathered metal, glass, and train exteriors.
The Decline (But Legacy Lives On)
The downside: Flo‑Master inks contained high levels of lead (or heavy pigments), which gave them their opacity and durability — but eventually led to regulatory pressure. As a result, production was suspended.
That meant official Flo‑Master inks and markers — in their original formulation — slowly disappeared. But their impact was already ingrained in graffiti history: they helped bridge the gap between early tagging with pens and the later development of modern capillary and valve markers designed for street writing.
Why Tools Evolved
Early pens and markers worked okay on paper or smooth surfaces but struggled on gritty concrete, metal, glass, or subway walls. Writers needed something more robust.
This environment bred creativity and improvisation: writers used makeshift tools like felt mops stuffed into bottles or used DIY inks to get up quickly and cheaply — giving birth to early “mop-style” tools.
Capillary Markers — Early‑Markers & the Start of Marker Culture
What is a Capillary Marker?
“Capillary marker” refers to a marker that uses capillary action (or gravity feed) — ink is drawn through a porous or fibrous tip (felt, fiber, or compressed synthetic material) from an ink reservoir, then flows out onto the surface.
Early felt‑tip/fiber‑tip markers were essentially the forerunners of modern fine‑liners, sketch‑markers, highlighters, and “standard markers.” The tip is absorbent; no pumps or valves — just natural flow driven by capillary action and gravity.
III. History of Capillary Markers
The first known patent for a felt‑tipped marking pen dates back to 1910, when Lee W. Newman filed for a pen that used a felt tip with an ink reservoir.
That early design didn’t really catch on for widespread use — inks, materials, and manufacturing weren’t optimized yet.
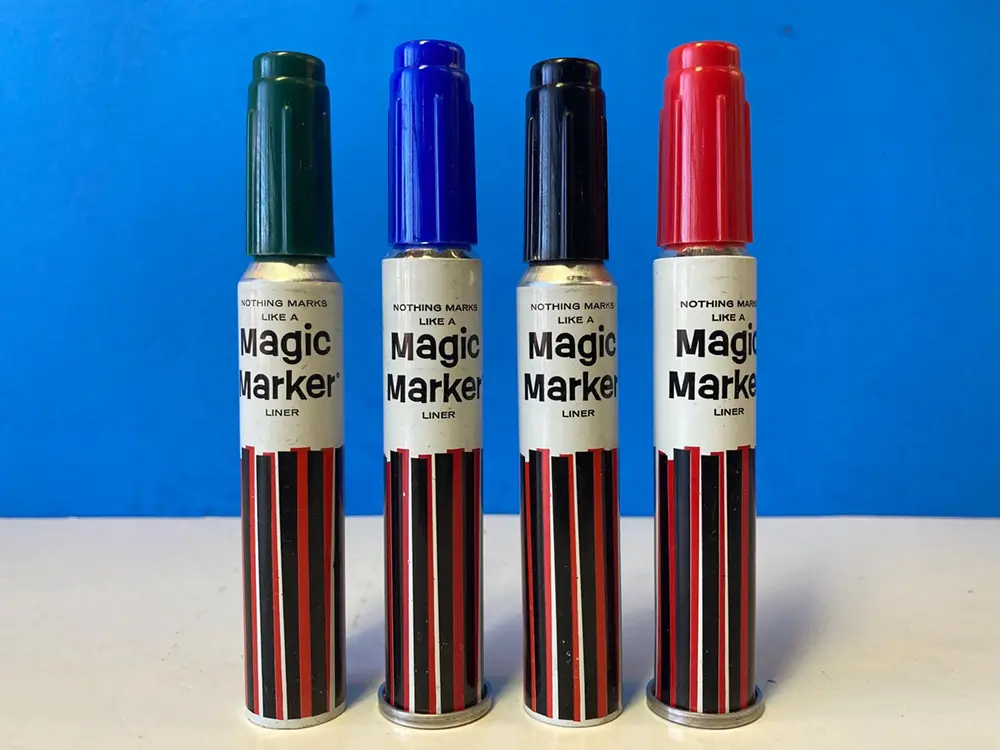
The real jump came in 1953, when Sidney Rosenthal introduced the “Magic Marker” — a small bottle of permanent ink with a felt wick. That design made markers practical for broader use: lettering, poster‑making, signage, and whatever needed quick bold marks.

By the late 1950s, felt‑tip markers had become common for everyday tasks — labeling, signs, posters, school and office work, art — and the base tech for many things we call “markers” today.
In the 1960s, firms refined the design. Fibertip pens (lighter nibs, better flow) appeared — for example, by companies like what would become major marker/pen makers.
IV. How Capillary Markers Work
Inside, there’s a reservoir that holds ink (often water- or alcohol-based inks in modern versions; earlier versions used solvent‑based permanent inks).
The tip is made of pressed fibers, felt, or synthetic fibrous material — this creates a matrix of tiny capillary channels. Ink is pulled through these channels by surface tension (capillary action), moving from reservoir to tip where it exits onto the surface.
Because the flow isn’t forced (as with valves or pressure), it’s more gentle and steady — which is why capillary markers produce thinner, precise, consistent lines. Great for detail, lettering, small tags, writing, sketching.
Pros & Cons of Capillary Markers
Pros
Precision & Control: Because flow is gentle, you get steady, thin, clean lines — ideal for detail work, fine tags, lettering, sketching.
Lightweight & Portable: Simple construction — reservoir + wick + tip. Easy to carry, small, quick to pull out and go.
Low Maintenance: No valves or mechanical parts; just seal it when you’re done. Less likely to clog or fail mechanically compared to valve markers.
Great for Ink‑type Work: Good when using thinner inks: water‑ or alcohol‑based, suitable for paper, cardboard, canvas, smooth surfaces.
Cons/Limitations
Limited Ink/Paint Viscosity: Because the delivery relies on capillary flow, too thick paint or heavy pigments may not flow reliably. Rough or porous surfaces may eat up ink by drawing more ink from the reservoir, emptying the barrel faster than usual.
Weaker Coverage on Rough/Non‑porous Surfaces: On metal, concrete, glass, old walls — coverage may be faint or inconsistent. Not ideal for bold tags on harsh surfaces.
Less Bold/Opaque Lines: Compared to paint markers or valve markers using opaque paints, capillary markers tend to produce thinner, more transparent strokes; layering heavy colors or robust coverage is harder.
Ink Longevity/Durability: On harsh surfaces or outdoors, ink may fade faster or bleed if not made permanent; less resistance compared to paint‑based markers.
V. How Capillary Markers Fit into Graffiti/Art Use
Capillary markers — the early felt/fiber‑tip markers — became a natural choice when graffiti and tagging began to evolve. For smaller tags, signatures, outlines, and detail work, they offered control and subtlety.
For sketching, paper-based layouts, or quick tags on semi‑smooth surfaces, capillary markers were ideal.
Writers could quickly tag signs, windows, subway posters, cardboard, or paper flyers with ease.
As marker technology matured, capillary markers stayed relevant — for tags on paper or cardboard, sketchbooks, concept work, and inking before painting. But for the most part, they were nogood for anything outdoors.
VI. What Exactly Is a “Mop” (Squeeze Mop/Refillable Mop Marker)
A “mop” is essentially a marker with a large, soft nib (felt or mohair) that varies in size and a large reservoir that can hold ink or paint — designed to deliver a lot of liquid to a surface, often producing bold strokes, plenty of drips, and heavy coverage.
Mops can be commercially made, or more famously, homemade — built from common items: e.g. felt from chalkboard erasers or shoe polish bottles stuffed with felt, filled with whatever ink or paint was available.
By the early to mid‑1970s, graffiti writing in NYC and other cities had transitioned beyond simple pen tags to more ambitious works. Writers began experimenting with whatever materials they had to get bolder, more visible tags.
As described in graffiti‑tool histories, mops were invented by graffiti writers in New York City — often DIY: stuffing felt or sponge into bottles (shoe‑polish bottles, old containers) and filling with inks or paints. This made tags bigger, thicker, and more visible — ideal for bombing trains, walls, or metal surfaces.
According to one source analyzing graffiti tools since the 1970s, way before Krink dropped the K60 Squeeze Mop, early writers used homemade mops using blackboard eraser felt into old bottles or even used shoe polish to make DIY inks.
These homemade mops belonged to a DIY ethic: not buying expensive gear, but repurposing materials to make durable tools that worked on tough surfaces (metal, concrete, subway cars), where regular pens or markers failed.
One of the most popular was the “Original NYC Mop”, which delivered extremely drippy tags, but there was no valve in place to control the flow of ink to the surface. This presented a problem for anyone carrying it around in their pocket. Most writers carried it in a ziplock bag to prevent the ink from spilling out onto their jeans & sneakers.
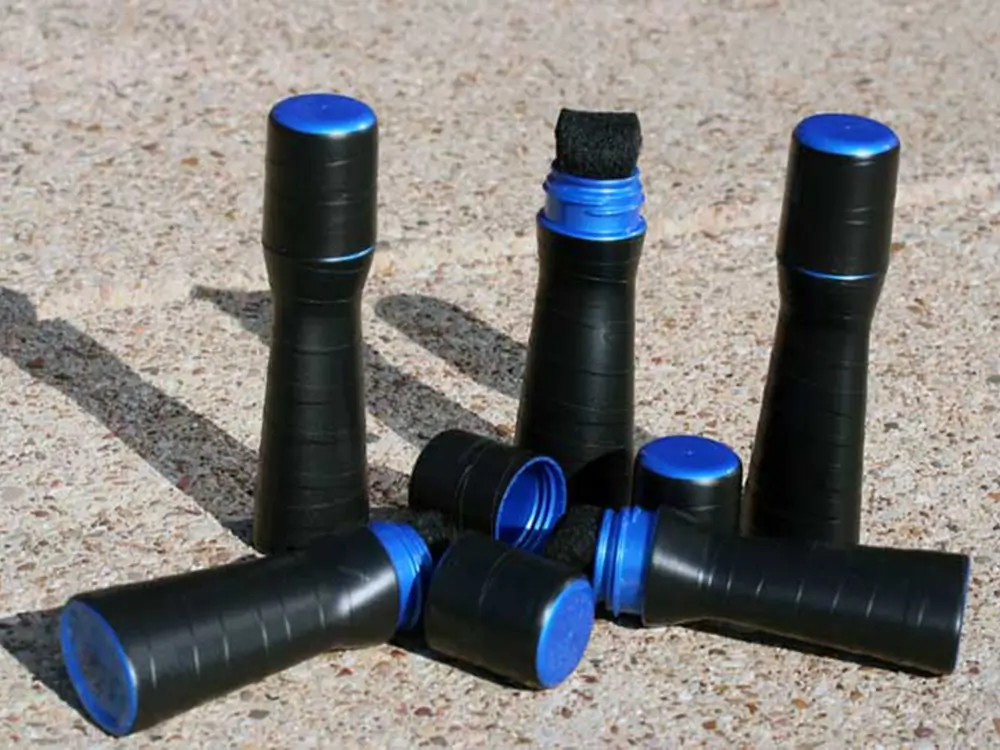
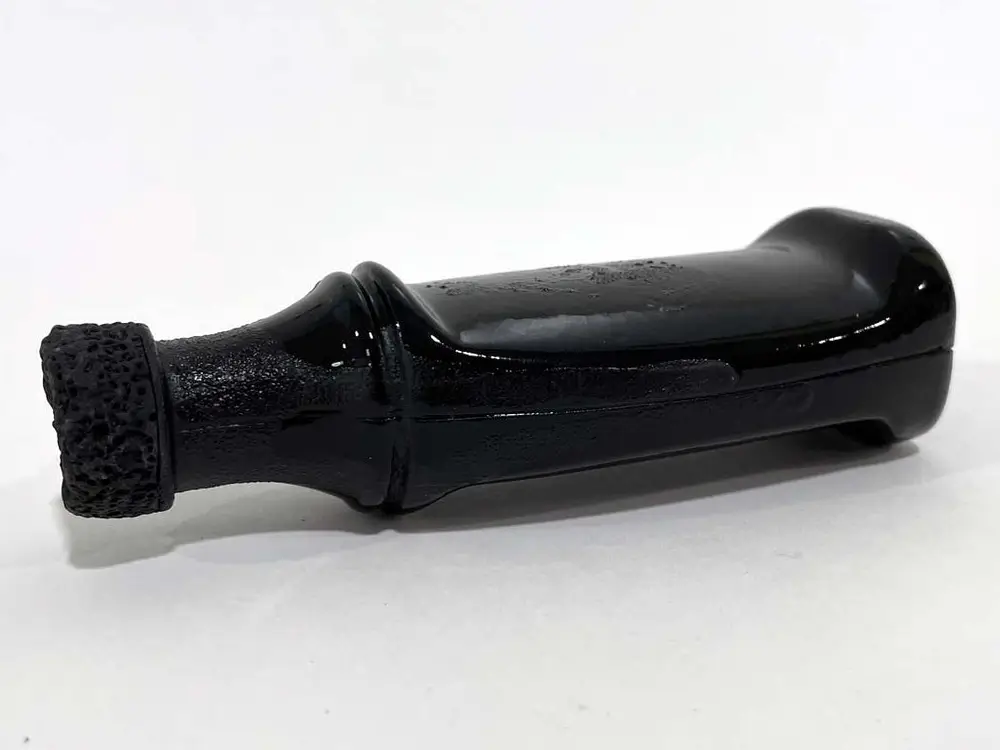
Another contender was the “Kiwi Mop” or shoe polish bottle mop, which had a 60ml-100ml bottle that held the ink or paint, a 1-inch in diameter foam applicator/nib and a screw-on cap. This style had it’s pros & cons as well. One of the pros being a 1-inch wide, solid nib that made thick and/or drippy lines and tags & one of the cons being that the foam nib would easily rip or tear off on textured surfaces like concrete. But the valve in place controlled the ink flow, which was a deciding factor for many writers. The Kiwi Mop could be carried around without having to worry of ink would leak all over your clothes & sneakers.
Because the nib is large and absorbent and the body often squeezable, you can control flow by hand pressure — enabling drips, thick lines, and quick coverage.
This mop/drip style, legend has it, was originally created by an OG NYC writer called “Roaches” back in the day. Seeing Roaches drip tags on the subways is allegedly where Krink got the idea for his mops. Back in the day if your tags, handstyles or pieces – regardless of what you used to get up (marker, mop or spraycan) – had any drips at all you were laughed at and called a toy. Now there are writers whose whole style is based on drips and mops made specifically to catch drip tags.
As graffiti became more widespread in the 1970s and 1980s — with walls, subway cars and metal doors becoming canvases — mops offered a unique advantage: coverage, drips, and boldness — things not possible with thin‑tip markers or early pens.
So the “Original NYC Mop” was not some corporate product but more a street‑made solution, born from necessity, thrift, and ingenuity.
Pros & Cons of Using Mops
Pros
High coverage & bold lines — The large nib and abundant paint/ink let you hit surfaces hard and fast. Great for bombing and pieces that need visibility.
Flexibility with materials — You can use ink or paint; water‑based, solvent‑based, or custom mixes depending on what you have.
Drips and expressive style — Because flow is manual (squeeze or press), you can create drips, spills, and painterly effects — a style in itself.
DIY/refillable/low‑cost — Ease of repurposing bottles or containers keeps costs down; refillable system lets you reuse instead of toss.
Cons/Trade‑offs
Messy & unpredictable — More paint means more chance of drips you don’t want, leaks, and messy work. Mistakes are harder to clean up and you can easily “flood” your tag to the point where you can’t even read it.
Less precision — Not ideal for fine lines, details, or clean lettering. Nib is too big and flow too heavy for subtle work.
Surface dependency — Best on walls, metal, rough surfaces; on smooth glass or fine surfaces you might get runs or weaker adhesion depending on paint/ink used.
Maintenance & preparation — If homemade, you need to mix ink/paint, thin properly, clean nibs / replace felt, manage consistency. Not a grab‑and‑go like markers.
VII. Choosing the Right Tool for Your Style
Picking the right graffiti tool isn’t just about preference — it’s about matching the tool to the surface, the style, and the effect you want. Here’s how to make the choice easier.
1. Surface Considerations
Different surfaces respond differently to markers, valve pens, and mops. Also, the finish on each surface also plays a part in how your mop or marker tag will look once dry. Different inks dry differently and have different effects on different surface finishes.
For instance, OTR .901 Stainless and Illadel Chrome Cherry for instance…depending on the surface type & finish, the paint might dry chrome or black/red. Other ink types that are heavy on staining will look a different color on different colored surfaces. The capabilities and combinations are endless.
Paper, Cardboard, Canvas:
-Capillary markers shine here for fine lines and sketches.
-Layering with valve markers works for bold accents.
-Mops are usually overkill unless doing larger backgrounds and canvas work.
Concrete, Brick, Metal, Wood:
-Mops excel for bold, quick coverage.
-Valve action markers handle medium-to-large lines, detail fills, and opaque paint.
-Capillary markers are limited to small tags or overlays.
Glass or Non-Porous Surfaces:
-Valve markers with opaque ink are best.
-DIY mops or thick capillary markers may smear unless tested.
Tip: Always test on a small area first — especially when using thick paints or DIY mop mixes.
2. Desired Line Thickness and Coverage
Thin, precise lines: Capillary markers are your go-to. Perfect for signatures, outlines, or sketches.
Medium-to-bold lines: Valve action markers allow consistent, controlled flow for visible, legible tags.
Extra-large coverage: Mops dominate. Ideal for any surface where visibility is key.
Quick Reference:
Capillary → fine detail, precision
Valve → versatile, medium-to-bold
Mop → maximum impact, thickest lines
3. Layering and Blending Techniques
Capillary markers: Layer lightly for subtle shading, blending and color transitions on smooth surfaces. Works well with sketchbooks or paper tags.
Valve markers: Great for layering colors, blending on metal, plastic, etc., and overlapping strokes. Works great on inside and outdoor surfaces.
Mops: Use pressure and angle to vary thickness; the more you squeeze the more ink/paint flows. For larger spots, or to takeover a nice-sized spot, fat letters and long drips are king.
Practice (in my Allen Iverson voice)
Hopefully this guide helps you understand the evolution and differences between capillary markers, valve action markers, and mops. The truth is, the best way to learn is to keep practicing — try different tools, experiment with techniques, and push your limits.
Hands-on experience will teach you more than reading articles or watching videos ever can. Mix and match, test surfaces, layer colors, and find what works best for your style. Every writer develops their own preferences, and that’s part of the fun (that eventually turns into mental illness).